If you’re looking to automate tasks in your web application testing or perform repetitive actions on your computer and you are thinking how to setup AutoIT with selenium, then this blog is for you only. AutoIT is a scripting language that allows you to automate Windows tasks, while Selenium is a popular automation testing framework for web applications. In this article, we will provide you with a step-by-step guide on how to use AutoIT with Selenium effectively.
Table of Contents
What is AutoIT?
AutoIT is a scripting language specifically designed for automating Windows tasks. It provides a simple and easy-to-understand syntax, allowing users to write scripts that control various aspects of the Windows operating system. With AutoIT, you can automate tasks such as opening and closing programs, interacting with GUI elements, and handling keyboard and mouse events.
What is Selenium?
Selenium is a widely used open-source automation testing framework for web applications. It provides a suite of tools and libraries that allow developers to automate browser interactions and perform functional testing. Selenium supports multiple programming languages, including Java, Python, and C#, making it a versatile choice for automating web applications.
Why to use AutoIT with Selenium?
AutoIT can be used with Selenium for several reasons. Here are some key benefits of using AutoIT alongside Selenium:
Windows Automation: AutoIT specializes in automating Windows tasks. By integrating AutoIT with Selenium, you can automate not only web browser interactions but also perform actions on the Windows operating system. This combination allows you to create end-to-end automation scenarios that involve both web application testing and Windows-specific tasks.
Handling Windows Dialogs: Sometimes, web applications trigger Windows-based dialogs for actions like file uploads, downloads, or authentication prompts. These dialogs are outside the scope of Selenium’s browser automation capabilities. However, AutoIT excels at handling such dialogs and can automate the interaction with them seamlessly. By incorporating AutoIT scripts into your Selenium workflow, you can automate the handling of these dialogs effectively.
Interacting with Desktop Applications: AutoIT provides features for automating various desktop applications, such as interacting with buttons, input fields, and other controls. If your web application interacts with a desktop application, AutoIT can help automate those interactions alongside the web browser actions performed by Selenium. This combined automation approach ensures comprehensive test coverage.
Extensive Library Support: AutoIT offers a rich library of functions and commands specifically designed for Windows automation. These functions enable you to control windows, simulate keystrokes and mouse actions, manipulate files, and perform a wide range of other Windows-related tasks. Integrating AutoIT with Selenium gives you access to this extensive library, enhancing the capabilities of your automation scripts.
Flexibility and Customization: AutoIT allows you to create highly customized automation scripts tailored to your specific needs. You can leverage its flexible scripting language to handle complex scenarios, implement conditional logic, and handle dynamic elements. When combined with Selenium, you have the flexibility to automate diverse tasks across web applications and Windows environments, making your automation solution more robust and adaptable.
By combining the strengths of AutoIT’s Windows automation capabilities with Selenium’s web automation features, you can create powerful automation workflows that cover both web applications and Windows tasks. This integration opens up a wide range of possibilities for automating complex scenarios and ensures comprehensive test coverage for your applications.
How to setup AutoIT with selenium
Installing AutoIT
Before you can start using AutoIT with Selenium, you need to install both tools on your machine. Here’s how you can do it:
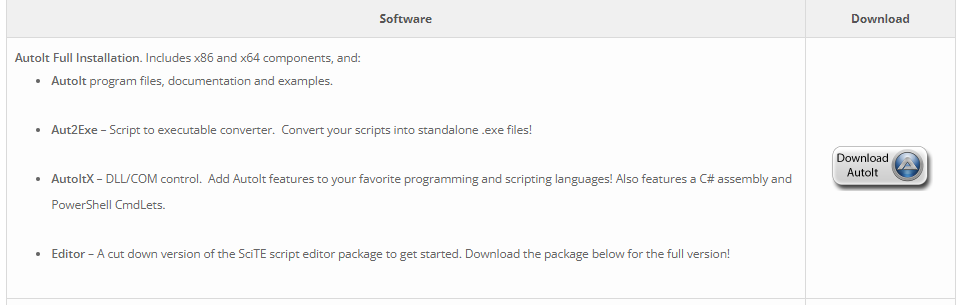
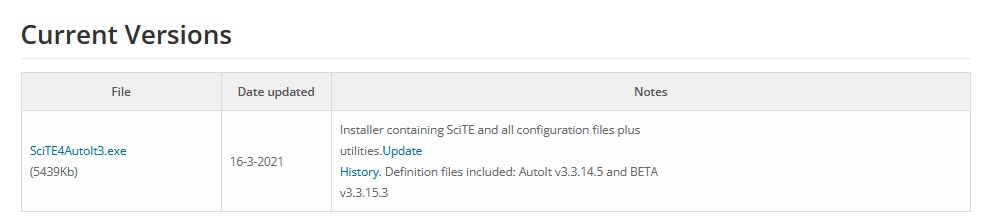
Step 1. Download and install AutoIT from the official website (https://www.autoitscript.com/site/autoit/).
Now extract zip and double click to install file “auto-it-v3-setup.exe”
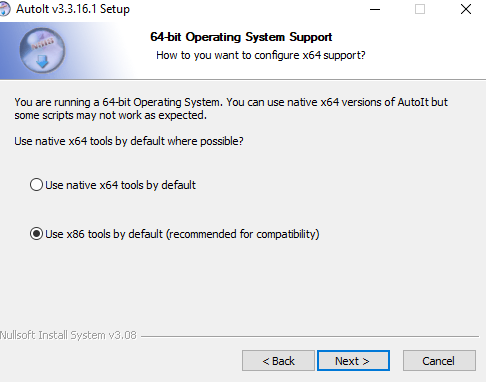
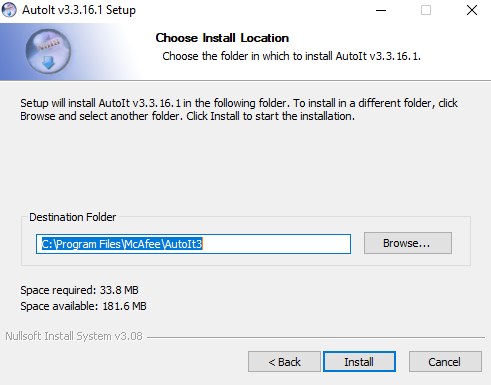
Click on next and land on below page and click “Install” and finish
Step 2: Install the AutoIT editor to record, write and compile your scripts.
Now, click on this button and new page will open , click on the link:
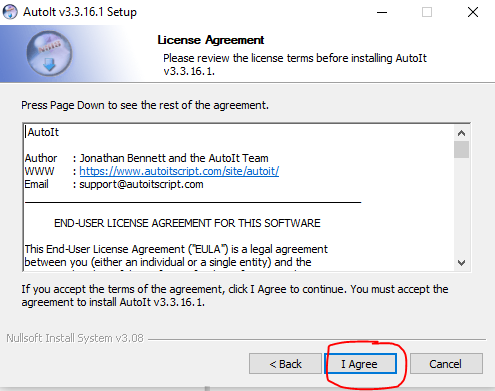
Now double click on it and click on next on below screen and then click “I Agree” on next screen and then click “Install” and Finish.
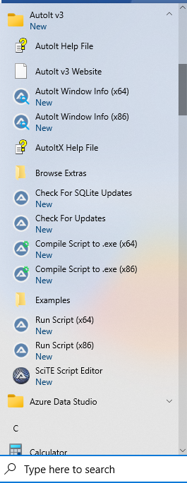
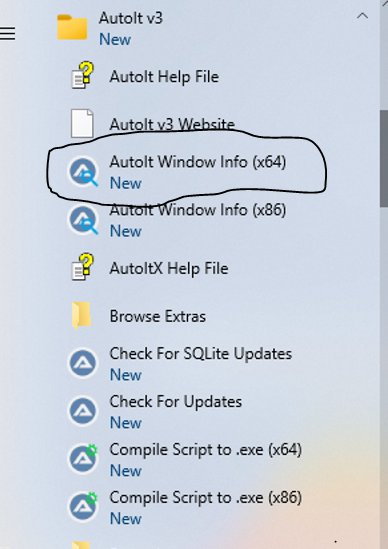
Now, go to windows and look for AutoIT , it will appear like below
Setting up AutoIT
Once you have AutoIT installed, you need to set it up for automation. Follow these steps to configure AutoIT:
Write or record your desired script using the AutoIT scripting language.
Launch the AutoIT editor.
Compile the script into an executable file (.exe).
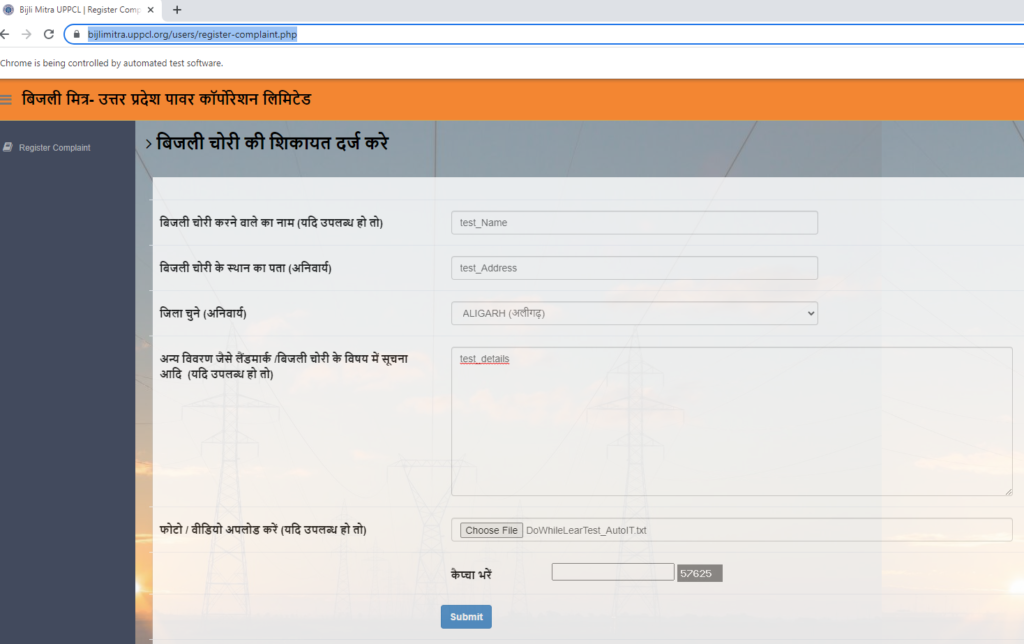
Now, let’s take example of file upload using AutoIT . For this we are using site “https://bijlimitra.uppcl.org/users/register-complaint.php”(USING THIS AS TO SEE HOW TO UPLOAD FILE, PLEASE DO NOT FEED UNNECESSARY DATA BY CLICKING ON SUBMIT BUTTON.)
Write or record your desired script using the AutoIT scripting language.
Open “https://bijlimitra.uppcl.org/users/register-complaint.php”.
Handling file upload using AutoIT in Selenium
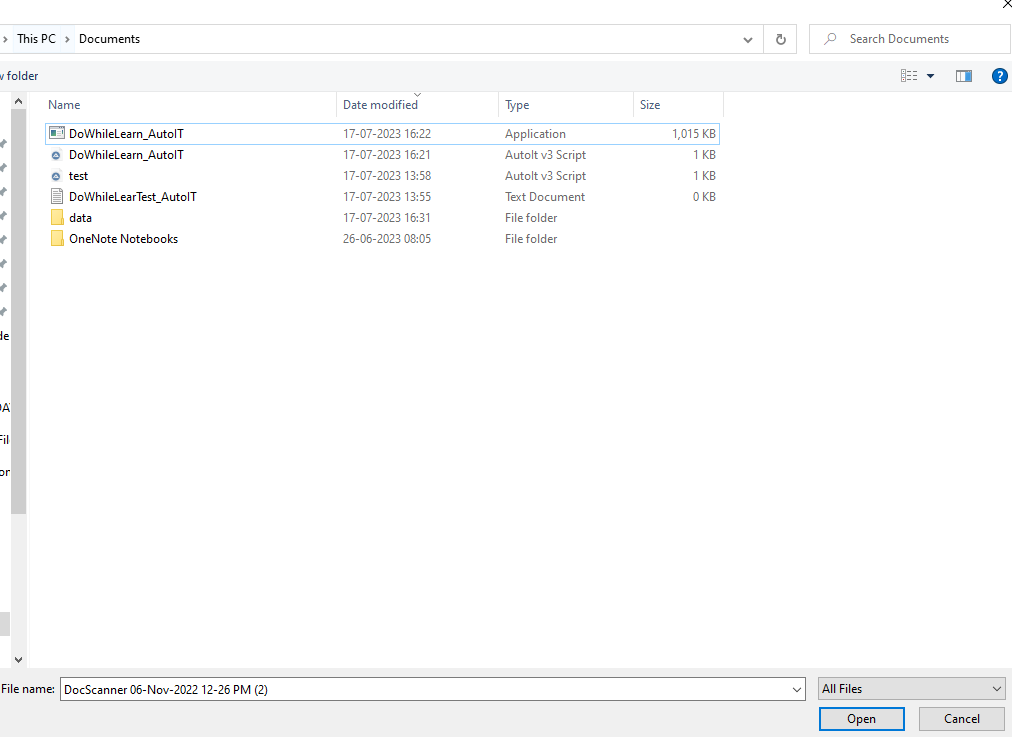
Here you can see choose file option, after clicking on it it will show below window pop up:
Now, we will create AutoIT script of above dialog box.
Step 1. Click on “AutoIT Windows Info (x64)” for 64 bit OS to use Finder tool to get properties of window dialog box elements to automate and then to freeze finder window press “Ctrl+ALT+F”
Now, click on Finder tool and drag and drop it to required element:
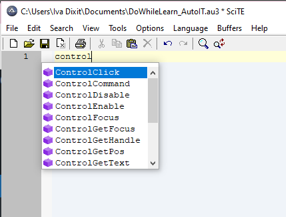
Launch the AutoIT Editor
Now, Open AutoIT script editor “SciTE” and type below command
To click on “File Name” box e will use : ControlFocus(“Open”,””,”Edit1″) , here arg1 is Title in finder tool and Edit1 is combination of class and instance
To enter File Name: ControlSetText(“Open”,””,”Edit1″,”C:\Users\Iva Dixit\Documents\DoWhileLearTest_AutoIT.txt”)
To click on open button: ControlClick(“Open”,””,”Button1″)
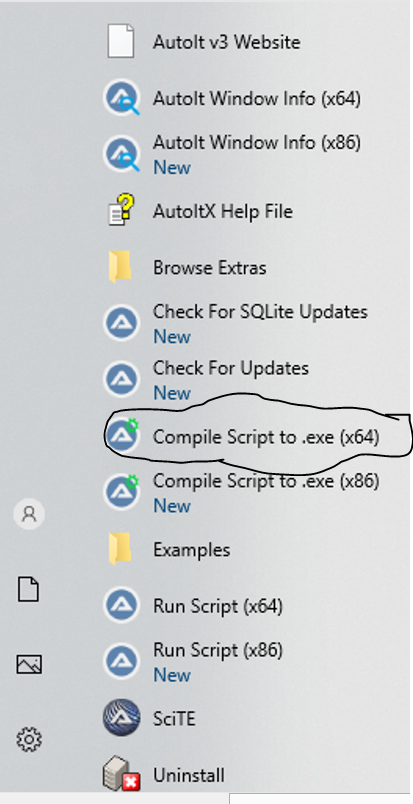
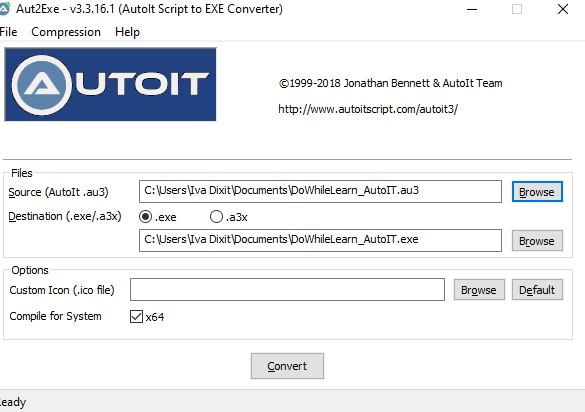
Save it in some location. Now our AutoIT file is ready. We need to convert it to exe file. Open “Compile Script to .exe(x64)” and upload .au3 file created above and click on convert.
Compile the script into an executable file (.exe).
Now, we have exe file with us.
Handling File Uploads with AutoIT and Selenium
One common use case for combining AutoIT with Selenium is handling file uploads in web applications. Many web applications use file upload fields to allow users to upload files from their local machine. Here’s how you can automate file uploads with AutoIT and Selenium:
Identify the file upload input element in the web application.
Use Selenium to interact with the file upload element and trigger the file selection dialog.
Execute JavaScript code in Selenium to run the AutoIT script that handles the file selection dialog.
The AutoIT script should automate the file selection and click the “Open” button in the dialog.
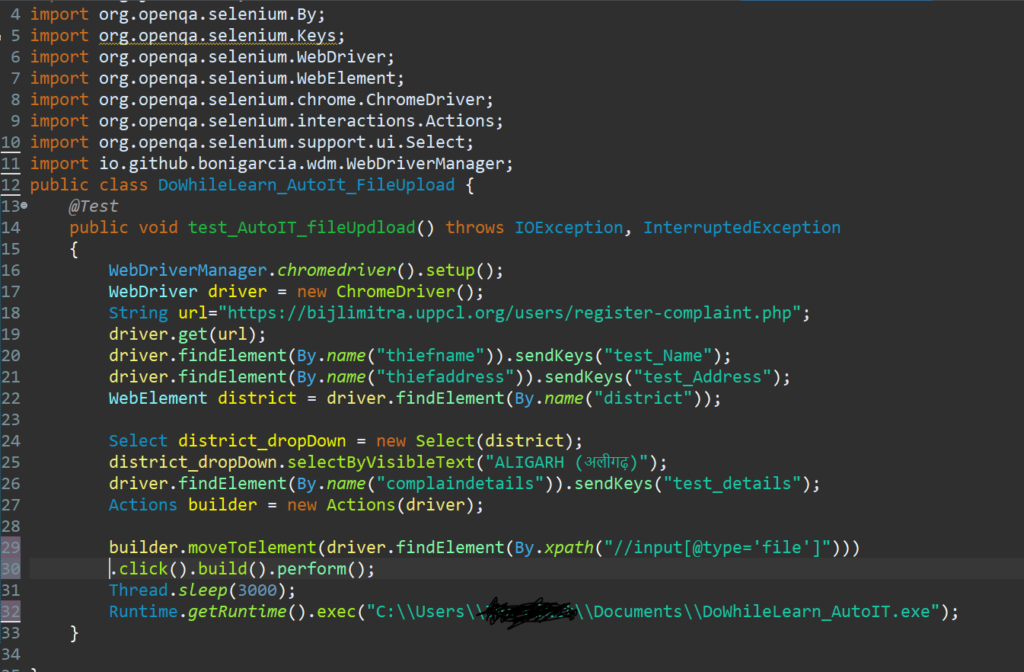
Please find below code for selenium AutoIT integration:
package doWhileLearn.selenium;

import java.io.IOException;

import org.junit.Test;
import org.openqa.selenium.By;
import org.openqa.selenium.Keys;
import org.openqa.selenium.WebDriver;
import org.openqa.selenium.WebElement;
import org.openqa.selenium.chrome.ChromeDriver;
import org.openqa.selenium.interactions.Actions;
import org.openqa.selenium.support.ui.Select;

import io.github.bonigarcia.wdm.WebDriverManager;

public class DoWhileLearn_AutoIt_FileUpload {

@Test
public void test_AutoIT_fileUpdload() throws IOException, InterruptedException
{
    WebDriverManager.chromedriver().setup();
    WebDriver driver = new ChromeDriver();
    String url="https://bijlimitra.uppcl.org/users/register-complaint.php";
    driver.get(url);
    driver.findElement(By.name("thiefname")).sendKeys("test_Name");
    driver.findElement(By.name("thiefaddress")).sendKeys("test_Address");
    WebElement district = driver.findElement(By.name("district"));

    Select district_dropDown = new Select(district);
    district_dropDown.selectByVisibleText("ALIGARH (अलीगढ़)");
    driver.findElement(By.name("complaindetails")).sendKeys("test_details");
    Actions builder = new Actions(driver);

    builder.moveToElement(driver.findElement(By.xpath("//input[@type='file']"))).click().build().perform();
    Thread.sleep(3000);
    Runtime.getRuntime().exec("C:\\Users\\test\\Documents\\DoWhileLearn_AutoIT.exe");

}
}
Automating Windows Tasks with AutoIT
In addition to web automation, AutoIT can also automate various Windows tasks. You can use AutoIT to automate tasks such as installing software, modifying system settings, and interacting with other Windows applications. With its extensive library and easy-to-use syntax, AutoIT provides a flexible solution for Windows automation.
Best Practices for Using AutoIT with Selenium
To ensure a smooth integration between AutoIT and Selenium, consider the following best practices:
Modularize Your Scripts: Break down your AutoIT scripts into smaller, reusable functions to promote code reusability and maintainability.
Error Handling: Implement error handling mechanisms in your scripts to gracefully handle unexpected scenarios.
Logging and Reporting: Use logging and reporting techniques to capture and analyze automation results effectively.
Version Compatibility: Ensure that the versions of AutoIT and Selenium are compatible with each other to avoid compatibility issues.
Conclusion
In this article, we have explored how to use AutoIT with Selenium for automating tasks in Windows and web applications. By combining the power of AutoIT’s Windows automation capabilities with Selenium’s web automation features, you can create robust and efficient automation scripts. Remember to follow the best practices mentioned to ensure a successful integration between the two tools.
Interview Questions
1. Can I use AutoIT with languages other than Selenium?
Yes, AutoIT can be used with other programming languages, provided there is a way to execute external scripts or binaries. However, Selenium is a popular choice due to its extensive browser automation capabilities.
2. Is AutoIT limited to Windows automation only?
AutoIT is primarily designed for Windows automation. While it can interact with certain elements of web applications, its capabilities are more focused on automating Windows tasks.
3. Are there any alternatives to AutoIT for Windows automation?
Yes, there are alternative tools for Windows automation, such as PowerShell, VBScript, and PowerShell Desired State Configuration (DSC). Each tool has its own strengths and is suitable for different use cases.
4. Can I use AutoIT to automate web browsers other than those supported by Selenium?
AutoIT is not limited to specific web browsers. You can use it to automate any browser that supports the execution of external scripts or binaries.
5. Is it possible to automate mobile applications with AutoIT?
No, AutoIT is primarily focused on Windows automation and does not provide native support for automating mobile applications. However, there are other tools specifically designed for mobile automation, such as Appium and UI Automator.
We tried our best to provide you details about AutoIT setup and integration. However, if you find anything is incorrect or missing please feel free to mention that in comments.