Selenium WebDriverManager
Life before Selenium WebDriverManager
Before the introduction of WebDriver Manager, managing WebDriver dependencies in Selenium testing was a manual process that involved several steps. Let’s explore how WebDriver dependencies were handled without WebDriver Manager:
- Downloading WebDriver Binaries: To use Selenium WebDriver, you needed to manually download the WebDriver binary for the specific browser and version you intended to automate. For example, if you were working with Chrome, you would need to visit the official ChromeDriver website, locate the appropriate version, and download the binary file.
- Adding WebDriver Binaries to the Project: After downloading the WebDriver binary, you had to manually add it to your project’s directory structure. Typically, it involved placing the WebDriver binary in a designated folder within your project, such as a “drivers” folder.
- Setting System Properties: Once the WebDriver binary was added to the project, you needed to specify the path to the WebDriver binary in your test code. This was done using the
System.setProperty()method, where you would provide the appropriate system property key and the path to the WebDriver binary file. - Ensuring Compatibility: It was crucial to ensure that the downloaded WebDriver binary was compatible with the browser version installed on the testing machine. In case of an incompatible version, you had to manually download the correct version of the WebDriver binary and update the project accordingly.
- Handling WebDriver Updates: As WebDriver and browser versions evolved, you needed to stay updated with the latest releases. This involved monitoring for new WebDriver versions, manually downloading the updated binaries, and replacing the existing ones in your project.
Overall, managing WebDriver dependencies without WebDriverManager required manual effort, vigilance, and frequent updates to ensure compatibility with different browser versions. It was a time-consuming and error-prone process that could lead to inconsistencies and configuration issues across different test environments.
Life after Selenium WebDriverManager
The introduction of WebDriverManager greatly simplified this process by automating the download and management of WebDriver binaries. It eliminated the need for manual downloads, system property configurations, and version compatibility checks. WebDriverManager handles the downloading, setup, and version management of WebDriver binaries automatically, ensuring a streamlined and hassle-free experience when working with Selenium WebDriver.
In the world of software testing and web automation, Selenium WebDriver has become one of the most popular tools for automating web browsers. However, setting up the WebDriver environment can sometimes be a tedious and complex process. This is where Selenium WebDriverManager comes to the rescue. In this article, we will explore what Selenium WebDriverManager is and provide example code in Java to demonstrate its usage.
Table of Contents
1. Introduction to Selenium WebDriver Manager
Selenium WebDriver Manager is a powerful tool that simplifies the management of WebDriver binaries and their dependencies. It automates the process of downloading the required WebDriver binaries and ensures that the correct version is used based on the browser and operating system being used for testing. WebDriver Manager eliminates the need for manual setup and helps in maintaining consistency across different test environments.
2. Installing Selenium WebDriver Manager
To install Selenium WebDriver Manager, you need to have Java Development Kit (JDK) and Maven installed on your system. Here are the steps to install WebDriver Manager:
- Open your preferred integrated development environment (IDE).
- Create a new Maven project or open an existing one.
- Add the WebDriver Manager dependency to your project’s Maven configuration file (
pom.xml). - Save the
pom.xmlfile and let the IDE automatically download the required dependencies.
Open eclipse IDE and click on New > Other > Maven > Maven Project.

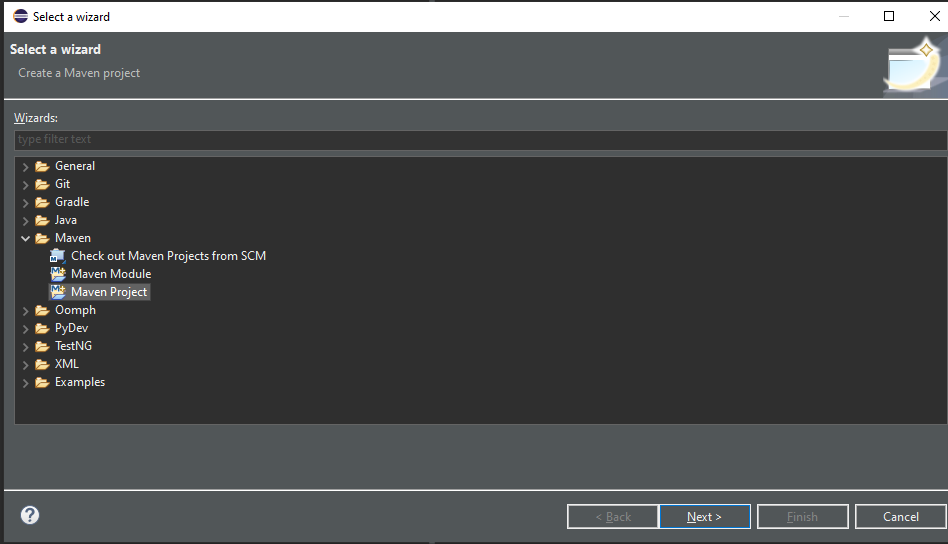
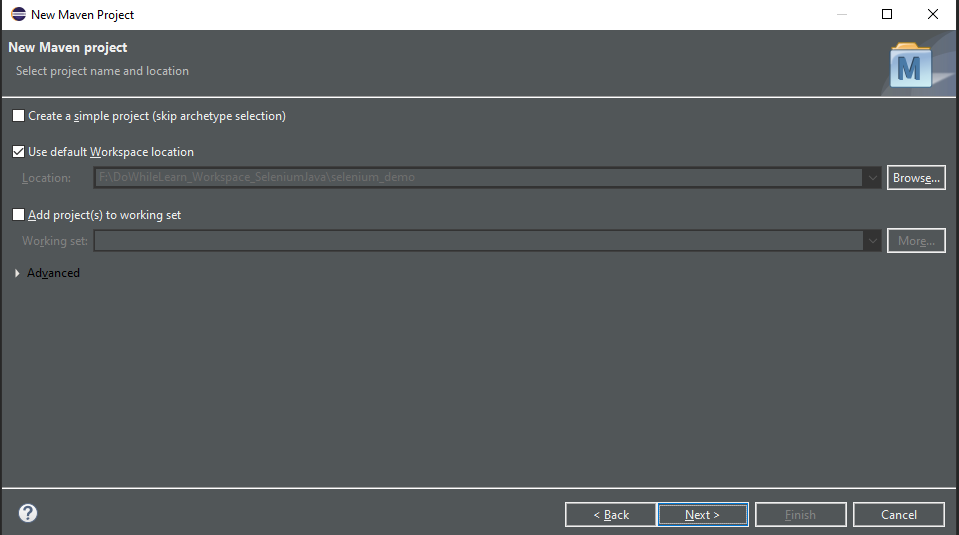
Following screen will appear just click on “Next”
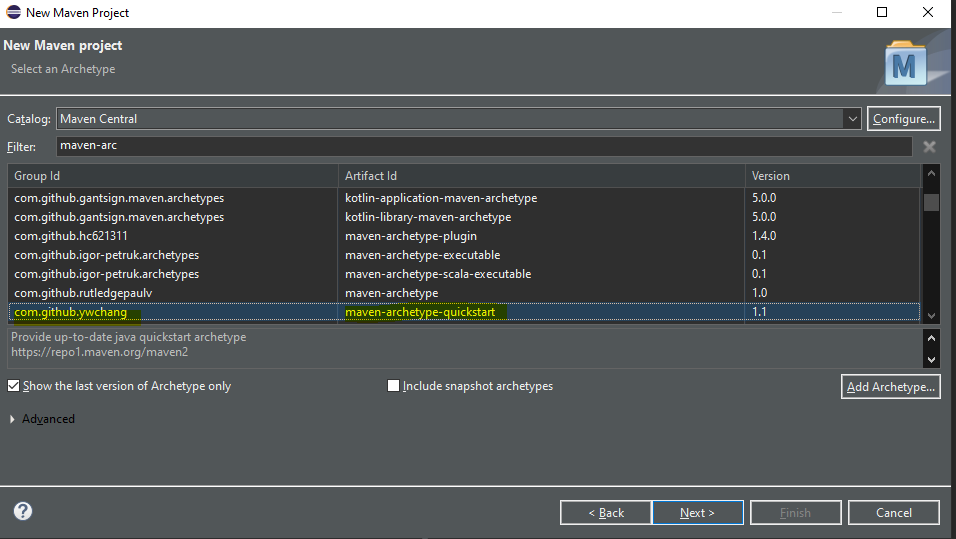
When selecting an archetype for your Maven project’s pom.xml file, it depends on the specific requirements and type of project you are working on.
“maven-archetype-quickstart” : This archetype is a good choice for creating a simple Java project. It sets up the basic structure with a source folder, a test folder, and a minimal pom.xml file. It’s suitable for projects that do not require any specific frameworks or technologies.
Now, select maven-archetype-quickstart and click on Next button.
On the Next screen, give Group Id and Artifact Id and click on “Finish” button.
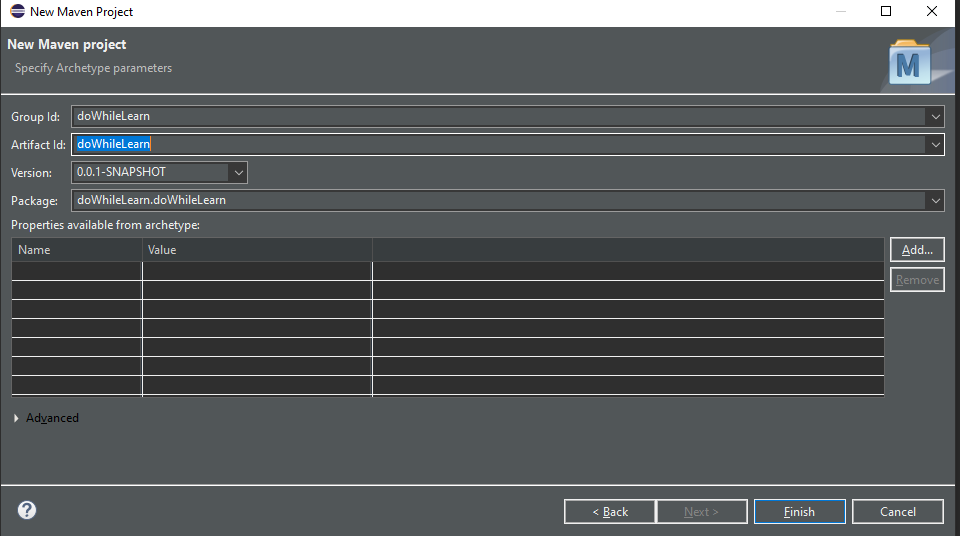
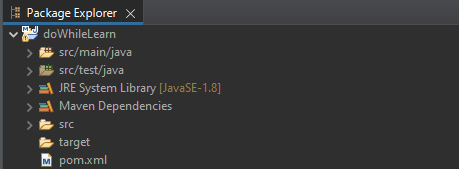
And here we go. New Maven project has been created as per below screenshot and notice there is a file pom.xml.
To add WebDriver dependency in the pom.xml file, you need to open the pom.xml file in a text editor or directly in the IDE.
Inside the <dependencies> tag of the pom.xml file, add the following code snippet to add the WebDriver dependency:
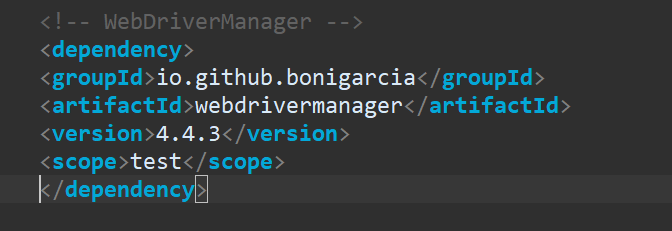
Make sure to specify the desired version of WebDriver Manager by replacing 5.1.3 with the appropriate version you want to use. Additionally, the <scope> tag is set to test to indicate that the dependency is required for running tests.
Save the pom.xml file, and the IDE will automatically download the WebDriver Manager dependency and its associated dependencies.
By adding the WebDriver Manager dependency in the pom.xml file, you ensure that the WebDriver Manager is included as part of your project’s dependencies, allowing you to utilize its features for managing WebDriver binaries in your Selenium tests.
Till now, we have Selenium Webdriver Manager dependency added t our project. Now, we have to use it in out test. But before that let’s understand what is POM.xml and what all details it consists:
What is POM.xml in Selenium Webdriver?
The pom.xml file, short for Project Object Model XML, is a configuration file used in Maven-based Java projects. It is an integral part of Maven, a build automation tool widely used in Java development.
The pom.xml file is typically located in the root directory of a Maven project. It defines the project’s configuration, dependencies, build settings, and various other aspects related to the project’s management and build process.
Here are some key elements and purposes of the pom.xml file:
- Project Information: The
pom.xmlfile includes project information such as the project’s name, description, version, and the organization or group responsible for it. This information helps identify and provide details about the project. - Project Dependencies: The
pom.xmlfile lists the project’s dependencies, which are external libraries or modules required by the project to compile, build, and run successfully. Maven resolves and manages these dependencies automatically, fetching them from remote repositories. - Build Settings: The
pom.xmlfile specifies the build settings for the project, including the source and target directories, compiler settings, packaging type (e.g., JAR, WAR), and other build-related configurations. These settings define how the project is built and packaged. - Plugins and Goals: Maven plugins are extensions that provide additional functionality during the build process. The
pom.xmlfile allows you to configure plugins and specify the goals (tasks) to execute. Plugins can be used for tasks such as running tests, generating documentation, packaging artifacts, and more. - Profiles: Maven supports profiles, which allow you to define different sets of configurations for various build environments or scenarios. Profiles in the
pom.xmlfile enable you to customize the build process based on specific conditions, such as development, testing, or production.
The pom.xml file serves as the central configuration and control point for Maven projects. It provides a standardized format for managing dependencies, build settings, and other project-related information. Maven uses this file to orchestrate the project’s build lifecycle, including compiling source code, running tests, packaging artifacts, and generating reports.
By maintaining a well-structured pom.xml file, tester/developers can easily manage project dependencies, ensure consistency across different environments, and streamline the build process using Maven.
3. Setting Up WebDriver Dependencies in Java
After installing WebDriver Manager, you need to set up the WebDriver dependencies in your Java project. Here’s how you can do it:
- Import the necessary WebDriver and WebDriver Manager classes in your Java code. Add the following import statements at the beginning of your Java file:
<code>import org.openqa.selenium.WebDriver;
import io.github.bonigarcia.wdm.WebDriverManager;
</code>
- Initialize the WebDriver Manager by calling the
WebDriverManager.getInstance().setup()method. This method ensures that the appropriate WebDriver binary is downloaded and configured based on the browser you plan to use in your tests. Here’s an example:
<code>WebDriverManager.chromedriver().setup();
</code>
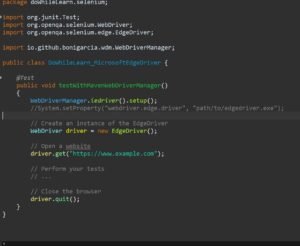
In the above code, we use chromedriver() to specify that we want to set up ChromeDriver. You can replace it with other browser options like firefoxdriver() or edgedriver() based on your requirements.
- Create a new instance of the WebDriver using the WebDriverManager. Here’s an example using ChromeDriver:
<code>WebDriver driver = new ChromeDriver();
</code>
You can create instances of other WebDriver implementations, such as FirefoxDriver or EdgeDriver, by replacing ChromeDriver with the appropriate class name.
- Now, you can perform actions with the WebDriver, such as navigating to a URL, interacting with elements on the page, or running automated tests.
- Finally, make sure to quit the WebDriver instance once you’re done with your testing to release the resources. Use the
quit()method as shown below:
<code>driver.quit();
</code>
By following these steps, you can effectively set up WebDriver dependencies in your Java project using WebDriver Manager. This simplifies the process and ensures that the correct WebDriver binaries are used, making your Selenium tests more reliable and maintainable.
4. Managing WebDriver Versions
One of the key features of WebDriver Manager is its ability to manage different versions of WebDriver. This allows you to specify the WebDriver version in your project’s configuration and ensure consistent execution across different environments. WebDriver Manager handles the downloading and usage of the specified version, making it easy to maintain and update your tests when new WebDriver versions are released.
To specify a specific version of WebDriver using WebDriver Manager, you can modify the setup() method call in Step 2. For example, to set up a specific version of ChromeDriver, you can use the version() method as shown below:
<code>WebDriverManager.chromedriver().version("87.0.4280.88").setup();
</code>
Replace the version number with the desired version of ChromeDriver.
By managing WebDriver versions with WebDriver Manager, you ensure consistency and compatibility across different test environments, making your Selenium tests more robust and reliable.
5. Using Selenium WebDriver Manager with Example Code
Let’s look at an example code snippet in Java that demonstrates how to use Selenium WebDriver Manager:
package doWhileLearn.selenium;

import org.junit.Test;
import org.openqa.selenium.WebDriver;
import org.openqa.selenium.chrome.ChromeDriver;
import io.github.bonigarcia.wdm.WebDriverManager;

public class doWhileLearn_WebDrieverManager {

	@Test
	public void doWhileLearn_WebDriverManager_Sample() {
		WebDriverManager.chromedriver().setup();
		WebDriver driver = new ChromeDriver();
		driver.get("https://www.google.com");

		// retrieve page title
		String pageTitle = driver.getTitle();
		System.out.println("Page Tile is : " + pageTitle);
		driver.quit();

	}
}
In this example, we first set up the WebDriver Manager for ChromeDriver by calling WebDriverManager.chromedriver().setup(). Then, we create a new instance of ChromeDriver, perform some actions, and quit the WebDriver at the end.
6. Conclusion
Selenium WebDriver Manager simplifies the process of managing WebDriver dependencies and ensures that the correct WebDriver version is used for testing. By automating the setup process, it saves time and effort for developers and testers. Using WebDriver Manager with example code in Java, you can easily integrate it into your projects and automate web browser testing efficiently.
Interview Questions
- What is Selenium WebDriver Manager?
Selenium WebDriver Manager is a tool that simplifies the management of WebDriver binaries and their dependencies. - How does Selenium WebDriver Manager work?
WebDriver Manager automates the process of downloading and configuring the required WebDriver binaries based on the browser and operating system being used. - Can I use Selenium WebDriver Manager with languages other than Java?
Yes, Selenium WebDriver Manager is compatible with multiple programming languages, including Java, Python, C#, and Ruby. - How do I specify a specific version of WebDriver using WebDriver Manager?
You can specify the desired WebDriver version in your project’s configuration, and WebDriver Manager will handle the downloading and usage of the specified version. - Is Selenium WebDriver Manager compatible with all browsers?
Yes, Selenium WebDriver Manager supports popular browsers like Chrome, Firefox, Safari, and Edge.
In this article, we discussed Selenium WebDriver Manager and provided example code in Java to demonstrate its usage. By leveraging the capabilities of WebDriver Manager, you can streamline the setup process and focus more on writing effective automated tests. Happy coding!